At Leaseweb, the Product Engineering teams are constantly working on adding and improving features based on customer feedback.
After learning about the need for easy deployment of a database server, Leaseweb is glad to introduce Unmanaged Database Installation on a single dedicated server instance. It allows for a basic setup of a single database as part of a complete reinstallation of the server.
In this first iteration, the following Database Management Systems (DBMS) are available for setup for Linux:
- MariaDB
- MongoDB
- PostgreSQL
- Redis
Demo setup
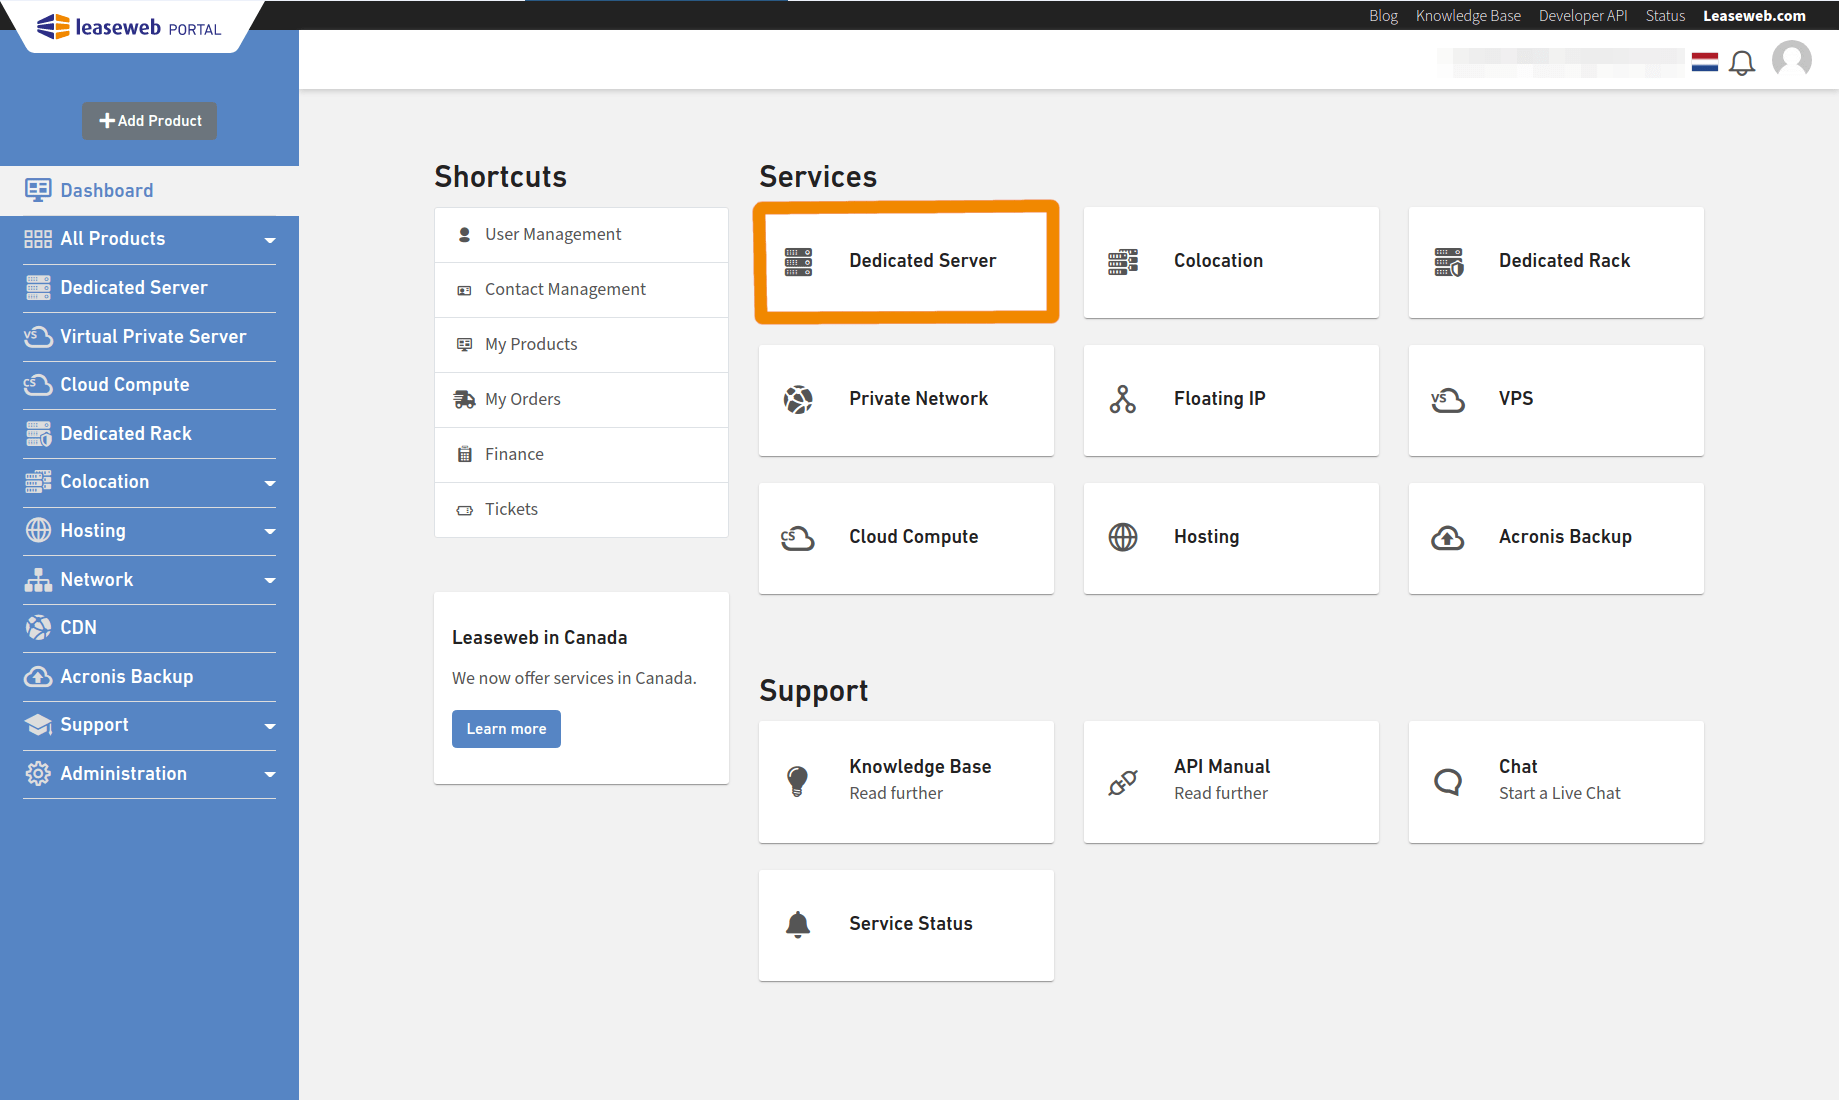
In order to use this feature, visit the Customer Portal.
Once logged in, you’ll see the “Dashboard” with all the services listed.
Under “Services” section, click on “Dedicated Server” and you will be redirected to the Dedicated Servers list page.
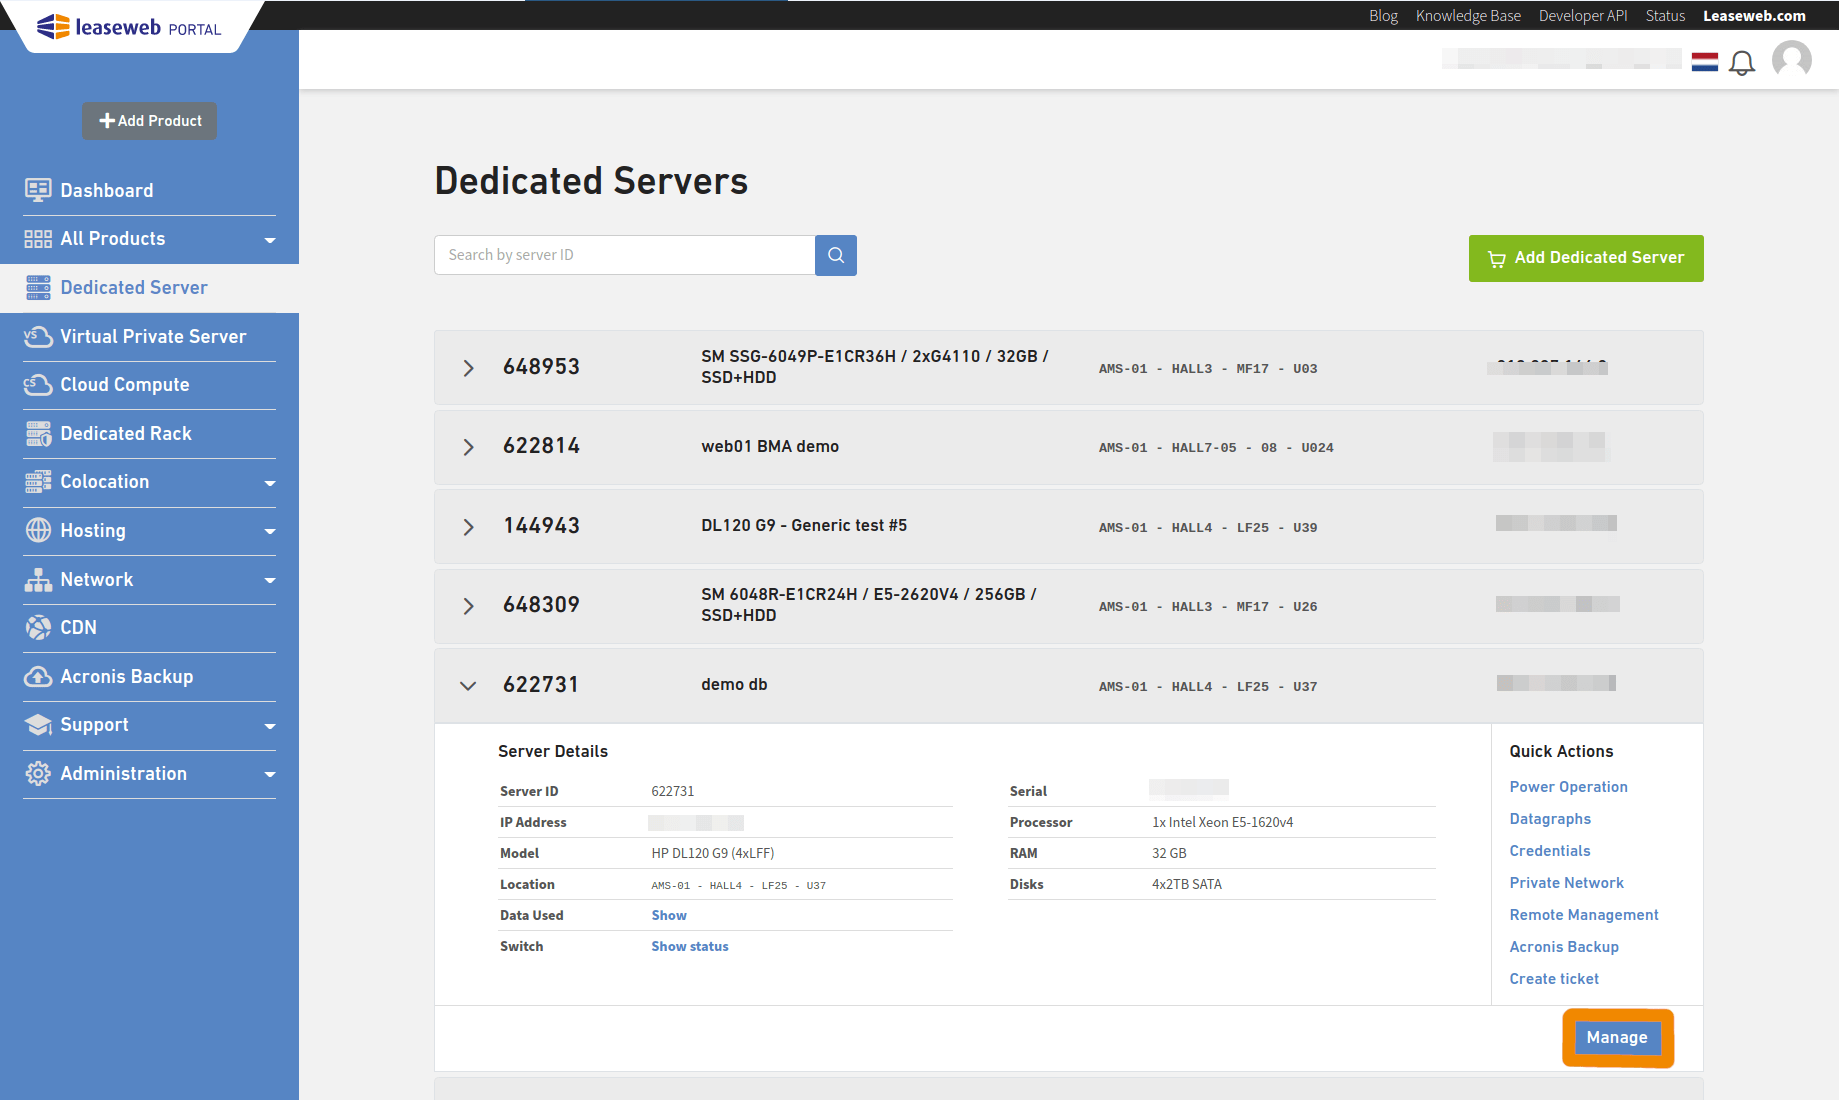
Select a dedicated server and click “Manage”.
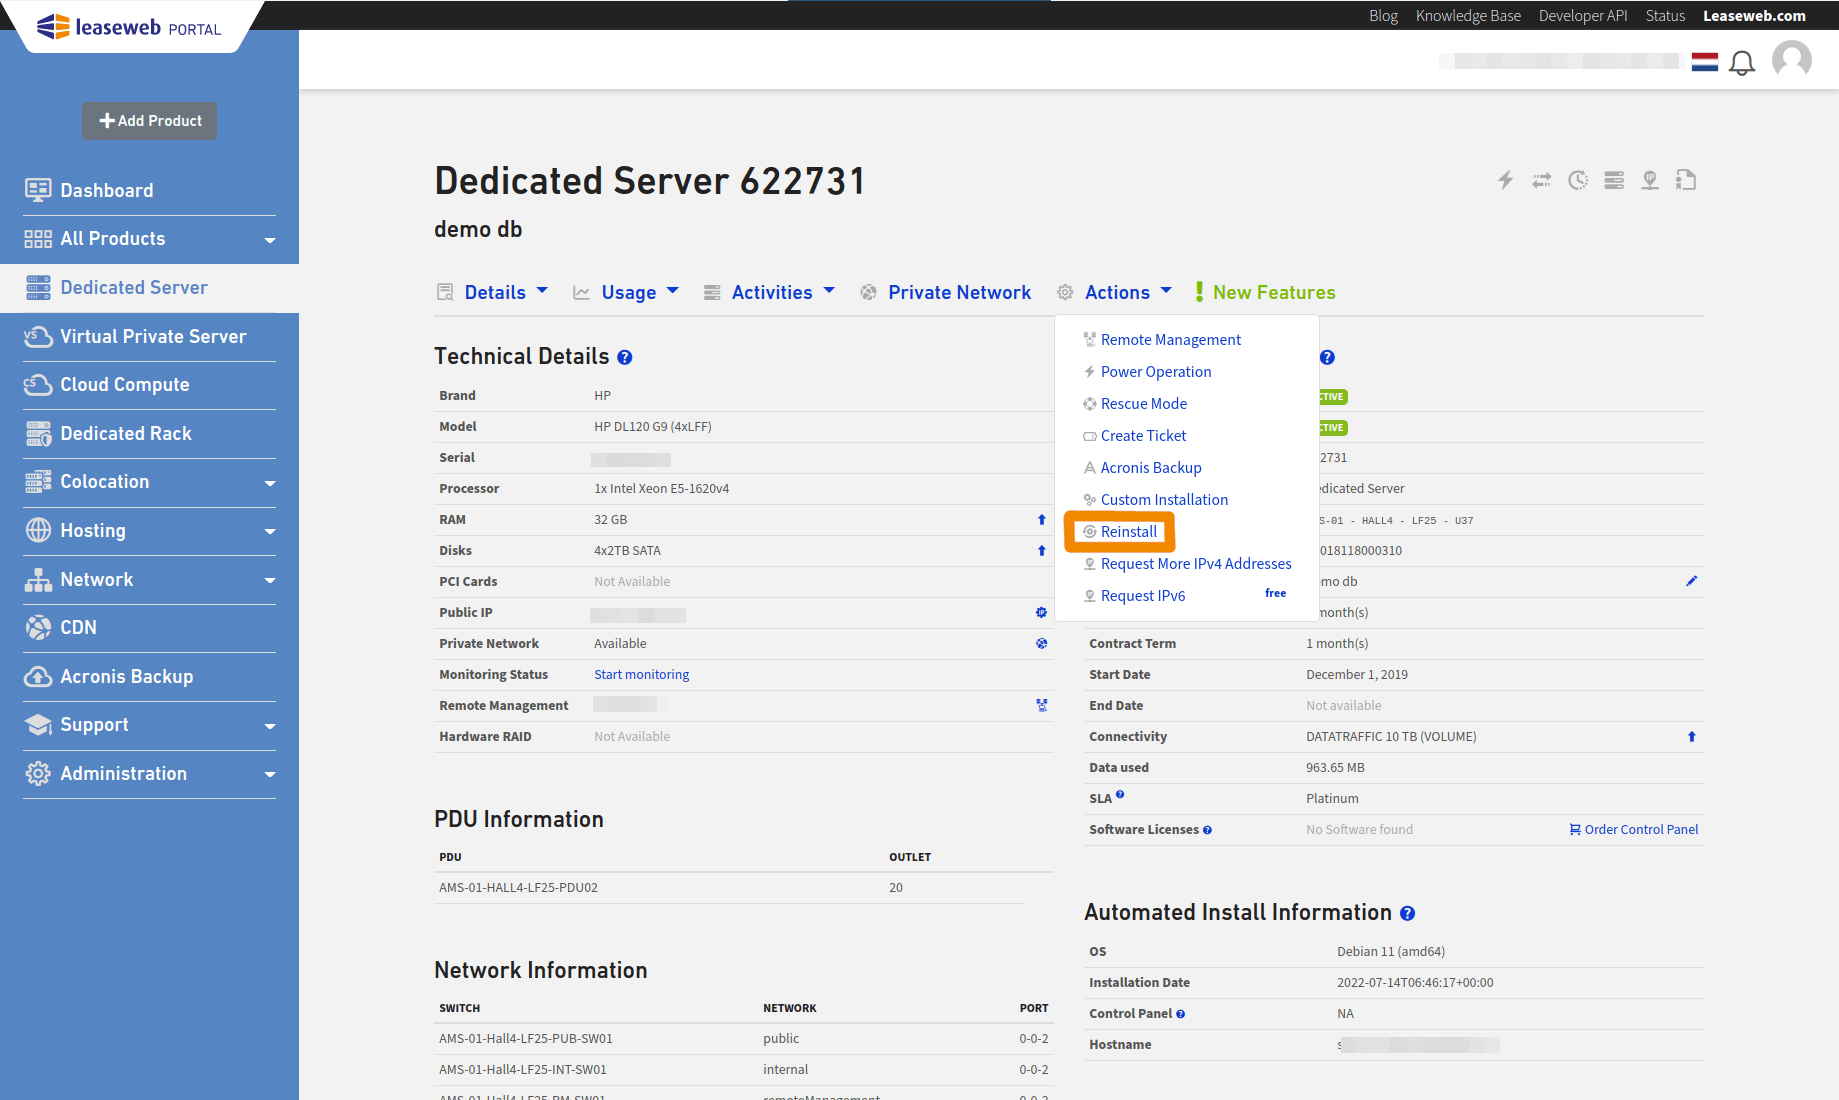
Once in the dedicated server page, click on “Reinstall” from the “Actions” menu in order to start the install wizard.
Within the wizard, select the desired operating system and inside the “Extra software” dropdown you can choose the DBMS you want to configure.

After selecting a DBMS, you should fill in the required configuration options. Those will depend on the DBMS selected.
For the example of PostgreSQL, there will be the database name, a username and a password for the database access, and the network interface type the DBMS should be bound to.
If your dedicated server is part of a private network, you can select either Internal or Public network interface.
If not, only the Public option is available and in that case, for security reasons, please note that you should have adequate firewall rules in place and use a strong password.
After entering the required options, you can proceed with the installation by clicking on the “Next Step” which will show the next sections (Raid and Partitioning, Settings, Confirmation).
Please enter the required configurations in all these sections. For exact details on how to set-up your instance, please visit our knowledge base.
Once you have confirmed the installation, please wait for our automation to complete the operating system installation along with the DBMS setup. This will take at least 15 minutes.
You can be notified through email about the installation status if you choose to.
Once the installation is complete, the database is ready to be accessed by your clients using the defined credentials and network.
Validation of connection
In the current example, you can validate the connection from another server in the private network using the PostgreSQL CLI command psql and the server internal IP.
# psql postgresql://demouser:demopassword@internal_IP/demodb

psql (9.2.24, server 13.7 (Debian 13.7-0+deb11u1))

SSL connection (cipher: ECDHE-RSA-AES256-GCM-SHA384, bits: 256)

Type "help" for help.


demodb=>
And you can also confirm the database is not accessible from the public network using the server public IP.
# psql postgresql://demouser:demopassword@public_IP/demodb

psql: could not connect to server: Connection refused

    Is the server running on host "public_IP" and accepting

    TCP/IP connections on port 5432?
We appreciate any feedback in the comments of this blog.
Jessie Mae
February 9, 2024 at 12:50Leaseweb’s introduction of Unmanaged Database Installation is a significant step forward for users requiring straightforward database server deployment on dedicated servers. This feature not only simplifies the setup process but also offers a range of DBMS options like MariaDB, MongoDB, PostgreSQL, and Redis, catering to diverse needs. For businesses and developers looking for even more specialized hosting solutions, particularly for AI-driven projects, aihost.com is worth exploring. Their expertise in providing hosting environments optimized for AI and machine learning applications can complement the robust foundation provided by dedicated servers, ensuring your projects have the power and flexibility they need to thrive.