Harnessing the combined power of VPS and Object Storage when migrating across platforms is not just a solution we advise to our customers, it’s one we’ve actually used ourselves. In this case study, I’ll walk you through an example of how we migrated our Knowledge Base (KB) platform and how VPS and Object Storage were used to make the transition as seamless as possible.
The Challenge
Leaseweb’s Knowledge Base (KB) is one of our most important platforms for internal and external users. When potential clients evaluate Leaseweb’s offering, they need to understand exactly how our services work and if they fit their needs. A well-built knowledge base lets them dig deep into our services without endless sales calls. It shows them important technical details instead of a marketing pitch, which is exactly what engineers and architects want to see during evaluation.
For our current customers, a knowledge base is even more important. Developers and DevOps teams of our clients don’t want to wait for support tickets or schedule calls every time they need to implement something new. They want to find answers immediately, especially during critical deployments or incidents. A well-built and updated Knowledge Base allows them to work independently, speeds up their development, and most importantly – shows that Leaseweb understands how technical teams work.
This self-service approach not only makes customers happier but also reduces strain on our support team.
Last year, like many companies, we faced a major decision when Atlassian announced the end of their server licenses for Confluence. The choice was clear but uncomfortable: either migrate to Atlassian Cloud with an 80,000 Euro annual price tag or find a different platform for our knowledge base.
This challenge gave us an opportunity to step back and rethink our entire documentation strategy and design. While Confluence had served us well, its enterprise focus and pricing didn’t match our current needs. After evaluating several alternatives and static site generators, we chose WordPress with BetterDocs – a documentation-focused plugin.
Building the new Knowledge Base
I am not going to describe the entire process of building our knowledge base in WordPress. Each company may have different requirements, needs, and approaches. However, I will go through the basics of our setup and share some custom code that helped us to complete it. As a theme builder we used Elementor, and to get the required elements in each article we have created custom fields with Advanced Custom Fields Pro.
Design
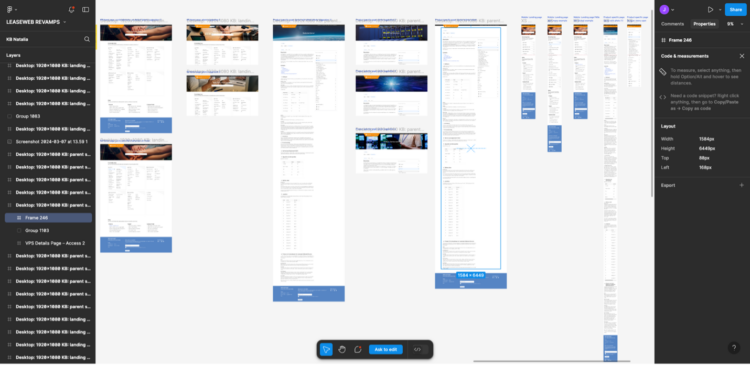
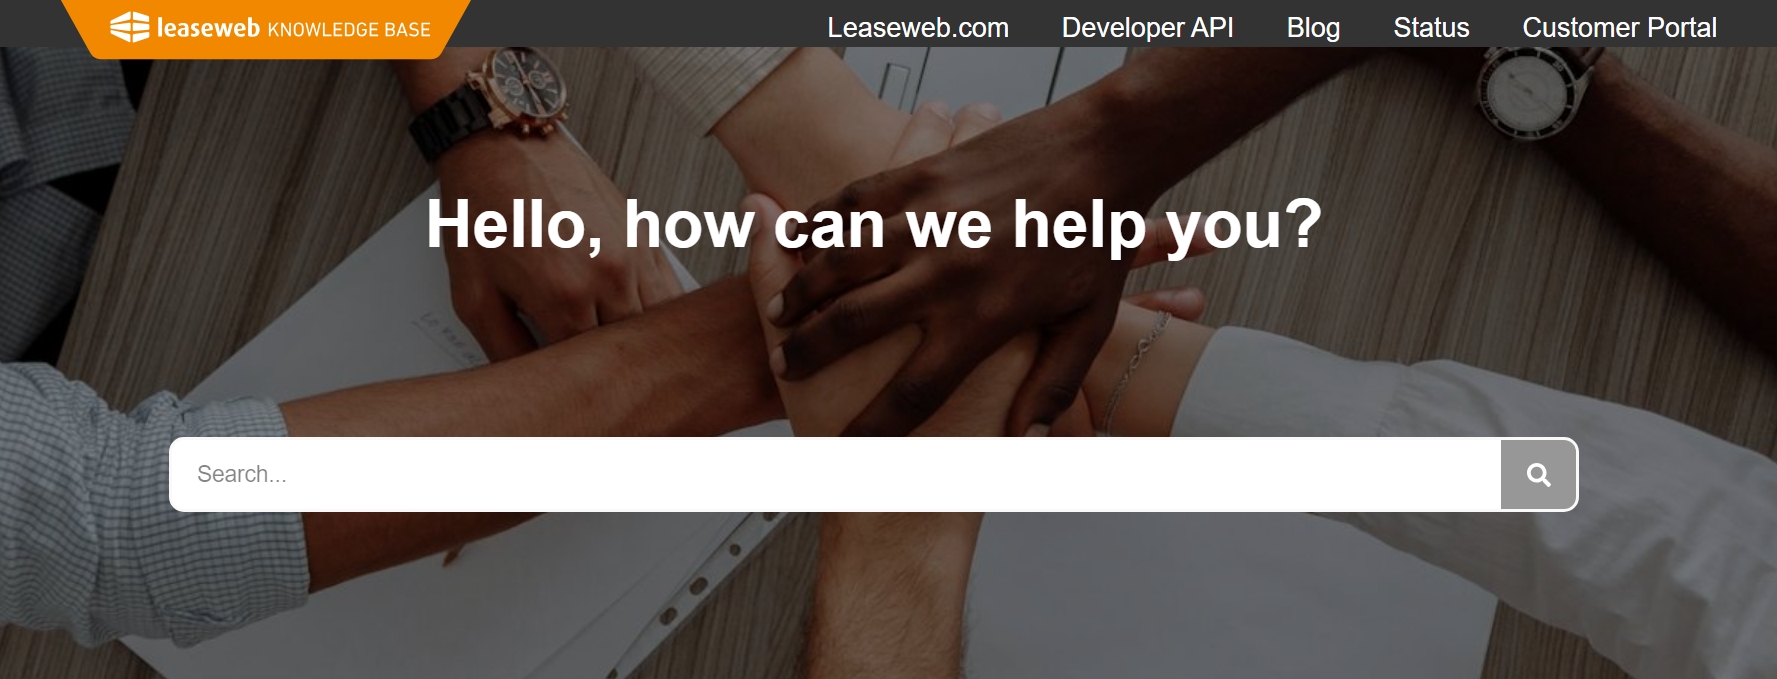
During the migration process, we took the opportunity to refresh the UI of our knowledge base to enhance usability and modernize the look and feel. Our UX designer prepared a new mockup in Figma, introducing an intuitive layout and refined design elements that make content easier to navigate, especially on mobile devices. Before finalizing, we tested the mockup with internal users to gather valuable feedback, ensuring the design aligns with user needs and expectations.
Custom code
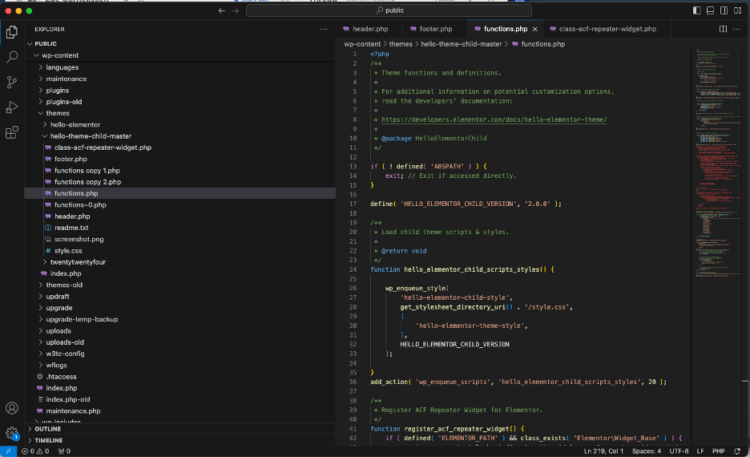
As mentioned above our new Knowledge Base in WordPress includes custom code elements embedded directly in the functions.php file, as well as several additional custom plugins designed to enhance functionality and improve internal and external user experience. These customizations allow us to tailor specific features.
However, I strongly recommend testing any modifications in a staging environment before implementing them on the live site. Additionally, always take a full backup of your WordPress site before making any changes to avoid potential data loss or site downtime.
ACF Repeater Widget for Elementor
Our knowledge base requires an FAQ section that allows authors to easily add, edit, and rearrange questions and answers. Unfortunately, the native Elementor setup doesn’t provide a way to use ACF repeater as a dynamic field. To solve this, we developed a custom solution using the Advanced Custom Fields (ACF) Repeater field type. This gives our content creators a user-friendly interface to manage FAQs, while allowing us to display them within our Elementor-powered pages.

FAQ section Backend of the post
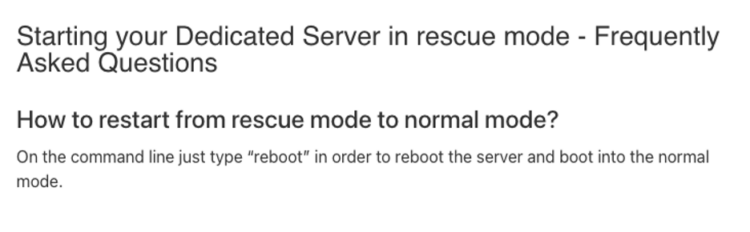
FAQ section Frontend of the post
/**
* Register ACF Repeater Widget for Elementor.
*/
function register_acf_repeater_widget() {
if ( defined( 'ELEMENTOR_PATH' ) && class_exists( 'Elementor\Widget_Base' ) ) {
require_once get_stylesheet_directory() . '/class-acf-repeater-widget.php';
\Elementor\Plugin::instance()->widgets_manager->register_widget_type( new \ACF_Repeater_Widget() );
}
}
add_action( 'elementor/widgets/widgets_registered', 'register_acf_repeater_widget' );
class-acf-repeater-widget.php – place in child theme main folder
<?php
/**
* ACF Repeater Widget for Elementor
* Julian Witkowski https://www.linkedin.com/in/julianwitkowski/
* @package ACF_Repeater_Widget
*/
if ( ! defined( 'ABSPATH' ) ) {
exit; // Exit if accessed directly.
}
/**
* Elementor widget for displaying ACF repeater fields.
*
* @since 1.0.0
*/
class ACF_Repeater_Widget extends \Elementor\Widget_Base {
/**
* Get widget name.
*
* @since 1.0.0
* @access public
*
* @return string Widget name.
*/
public function get_name() {
return 'acf-repeater';
}
/**
* Get widget title.
*
* @since 1.0.0
* @access public
*
* @return string Widget title.
*/
public function get_title() {
return __( 'ACF Repeater', 'acf-repeater-widget' );
}
/**
* Get widget icon.
*
* @since 1.0.0
* @access public
*
* @return string Widget icon.
*/
public function get_icon() {
return 'eicon-posts-grid';
}
/**
* Get widget categories.
*
* @since 1.0.0
* @access public
*
* @return array Widget categories.
*/
public function get_categories() {
return [ 'general' ];
}
/**
* Register widget controls.
*
* @since 1.0.0
* @access protected
*/
protected function register_controls() {
$this->start_controls_section(
'section_content',
[
'label' => __( 'Content', 'acf-repeater-widget' ),
]
);
$this->add_control(
'acf_repeater_field',
[
'label' => __( 'ACF Repeater Field', 'acf-repeater-widget' ),
'type' => \Elementor\Controls_Manager::SELECT,
'options' => $this->get_acf_repeater_fields(),
]
);
$this->end_controls_section();
}
/**
* Render widget output on the frontend.
*
* @since 1.0.0
* @access protected
*/
protected function render() {
$settings = $this->get_settings_for_display();
$repeater_field = $settings['acf_repeater_field'];
if ( $repeater_field ) {
$rows = get_field( $repeater_field );
if ( $rows ) {
echo '<ul>';
foreach ( $rows as $row ) {
echo '<li>';
// Output your repeater row data here
echo '<h3>' . $row['faq-question-repeater'] . '</h3>';
echo $row['faq_answer_repeater'];
echo '</li>';
}
echo '</ul>';
}
}
}
/**
* Get ACF repeater fields registered for the current post type.
*
* @since 1.0.0
* @access private
*
* @return array ACF repeater fields.
*/
private function get_acf_repeater_fields() {
$fields = [];
$field_groups = acf_get_field_groups();
foreach ( $field_groups as $field_group ) {
$fields_array = acf_get_fields( $field_group );
foreach ( $fields_array as $field ) {
if ( $field['type'] === 'repeater' ) {
$fields[ $field['key'] ] = $field['label'];
}
}
}
return $fields;
}
}
This function registers a custom Elementor widget that utilizes Advanced Custom Fields (ACF) Repeater functionality. It allows you to create dynamic, repeatable content sections within your Elementor-built pages, enhancing the flexibility of your Knowledge Base layout.
Contributor Role Restrictions
We want to allow our subject matter experts to contribute new articles and revise existing ones, but we need to maintain control over the publishing process. To achieve this, we created custom code that hides the edit, quick edit, and delete functionality from non-admin users. This ensures contributors can only create new content or submit revisions, without accidentally modifying or removing live articles.

View as a contributor
/**

* Hide edit, quick edit, and delete for contributors

*/

function remove_quick_edit_and_delete( $actions ) {

if ( current_user_can('contributor') ) {

unset($actions['edit']);

unset($actions['inline hide-if-no-js']);

unset($actions['trash']);

}

return $actions;

}

add_filter('post_row_actions', 'remove_quick_edit_and_delete', 10, 1);
This function removes the ‘Edit’, ‘Quick Edit’, and ‘Delete’ options for users with the Contributor role. It helps maintain content integrity by preventing contributors from modifying or deleting existing posts.
/**

* Hide the delete link and delete revision button in the post edit screen for contributors

*/

function remove_delete_links_for_contributors() {

if ( current_user_can('contributor') ) {

echo '<style>

.submitdelete,

.components-button.editor-post-trash.is-next-40px-default-size.is-secondary.is-destructive {

display: none !important;

}

</style>';

}

}

add_action('admin_head', 'remove_delete_links_for_contributors');
This function hides the ‘Delete’ link and ‘Delete Revision’ button in the post edit screen for Contributors. It further reinforces content protection by removing the ability to delete posts or revisions.
/**

* Hide top bar elements for contributors

*/

function remove_admin_bar_items_for_contributors($wp_admin_bar) {

if (current_user_can('contributor')) {

$wp_admin_bar->remove_node('edit');

$wp_admin_bar->remove_node('new-content');

$wp_admin_bar->remove_node('comments');

$wp_admin_bar->remove_node('wp-logo');

$wp_admin_bar->remove_node('wp-admin-bar-archive');

}

}

add_action('admin_bar_menu', 'remove_admin_bar_items_for_contributors', 999);
This function customizes the WordPress admin bar for Contributors by removing specific items such as ‘Edit’, ‘New Content’, ‘Comments’, and the WordPress logo. It streamlines the user interface for Contributors, focusing their attention on essential tasks.
/**

*Limit blocks for contributors

*/

add_filter( 'allowed_block_types', 'wpse324908_allowed_block_types', 10, 2 );

function wpse324908_allowed_block_types( $allowed_blocks, $post ) {

// Check if the current user has the 'contributor' role

if ( current_user_can( 'contributor' ) ) {

$allowed_blocks = array(

'core/block', // <-- Include to show reusable blocks in the block inserter.

'core/image',

'core/paragraph',

'core/heading',

'core/list',

'core/list-item',

'core/code',

'core/details',

'core/table',

'core/button',

'core/buttons',

'core/column',

'core/columns',

'core/embed',

'core/media-text',

);

}

return $allowed_blocks;

}
This function limits the available block types in the Gutenberg editor for Contributors. It ensures that Contributors can only use specific blocks, maintaining consistency in your Knowledge Base content structure and preventing the use of potentially disruptive elements.
Hide BetterDocs Switch Button php
The modern user interface of the Better Docs plugin didn’t fully meet our requirements. We wanted to provide a more familiar WordPress admin experience for our content authors, where they could easily navigate the classic post editing screens. To achieve this, we disabled the Better Docs UI for non-admin users, reverting them to the standard WordPress post layout.
// Hide switch ui
add_action('admin_head', 'hide_betterdocs_switch_button');
function hide_betterdocs_switch_button() {
echo '<style>
a.page-title-action[href="admin.php?page=betterdocs-admin"] {
display: none !important;
}
</style>';
}
This function hides the BetterDocs switch button in the admin interface. It helps streamline the user interface by removing unnecessary elements, potentially reducing confusion for content creators.
Migration of content from Confluence
Our journey to migrate our Knowledge Base from Confluence to BetterDocs was not without its challenges. Initially, we attempted to create a custom script to extract content from Confluence’s backend and split it into separate files. However, we quickly realized this approach was incompatible with BetterDocs’ specific CSV import requirements.
Screaming Frog
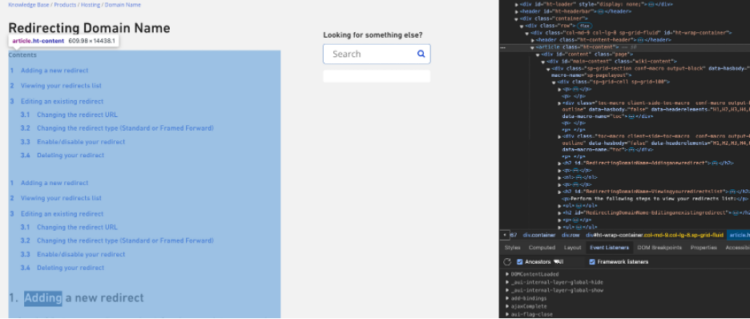
Faced with this obstacle, we tried a simple web scraping solution using Screaming Frog SEO Spider. We configured Screaming Frog to capture all content nested within the ‘ht-content’ class, which contained our target documentation. This method proved to be more flexible and efficient for our needs.
Before initiating the scraping process, we exported all images from Confluence. This step was crucial to ensure we had local copies of all visual assets. We then set up Screaming Frog with a custom extractor using XPath to target the ‘ht-content’ class and extract the HTML elements.
After scraping the data, we performed the necessary post-processing. This included cleaning up the CSV file by removing unnecessary columns and updating image paths using Visual Studio Code. We carefully formatted the CSV file to meet BetterDocs’ import requirements, ensuring we had columns for title, content, and optionally, category and tags.
Images migration
Visual documentation plays an essential role in our knowledge base, with many articles containing sometimes 20-30 screenshots showing exact UI elements and configuration steps. These visuals improve the understanding of our platform’s features and setup processes. However, when planning our migration from Confluence, we knew that manual re-uploading of images and replacing source paths would have required weeks of monotonous work.
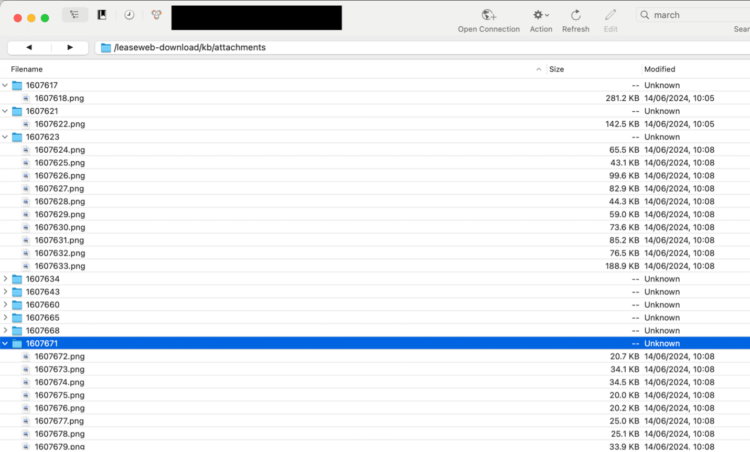
Fortunately, Confluence’s space export feature provided a solution by allowing us to download all images in a single ZIP file. For the storage of the downloaded images we picked our own solution – Leaseweb Object Storage. As for the images upload process, we chose Cyberduck specifically because it handles Object Storage as a hierarchical file system, creating clean, organized paths like ‘kb/images/picture1.jpg’. This approach is more manageable than dealing with the flat structure typical of direct Object Storage interfaces.
However, we still faced a mismatch between the exported folder structure and image source paths in the content file. The original Confluence format had complex image paths like:
files/1608566/65110022/1/1658836782618/image2022-5-31_9-29-27.png
While the exported files paths and names were in the following format: files/1608566/65110022/1/1658836782618.png
Using Visual Studio Code’s regex functionality, we transformed these into cleaner, Object Storage-compatible paths like <img class=”object-storage-leaseweb/files/1608566/65110022/1/1658836782618.png”>.
To bring optimal performance in our new knowledge base, we didn’t just migrate the images – we optimized/compressed them before uploading to Object Storage, this helped us to reduce load times.
As a software to manage our object storage we decided to use CyberDuck. The combination of Cyberduck’s hierarchical storage structure, updated path formatting, and image optimization resulted in a system that’s also easier to maintain. What could have been weeks of manual work turned into 2 hours of technical solution implementation.
As a last step before the big go-live we verified each imported article, confirming that content and images displayed correctly.
Setting up a VPS
When we decided to go with WordPress on our own platform, our own VPS was an obvious choice. We wanted something that would allow and could hold multiple users to access and work on articles at the same time without downtime.
One helpful feature is VPS Snapshots—it lets us save the exact state of the server at any given time, so if we’re about to make big changes, we can take a snapshot first and have the option to restore it if something goes wrong.
Here at Leaseweb, we put emphasis on the security of our data and the data of our clients. The VPS also includes Firewall Filtering, which blocks all traffic except what we specifically allow. This keeps the server secure without a lot of manual setups.
Finally, DDoS Protection comes standard, which helps filter out malicious traffic and keeps everything running smoothly, even under potential attacks.
Setting up and using KB confirmed that our VPS platform is a solid choice for teams who need a secure and flexible setup for collaborative work.
WordPress installation on VPS
The entire tutorial and steps on how to install WordPress on our VPS can be found on our Knowledge Base. Yes, the same KB that you’re reading the article about.
WordPress migration
When it came to moving our KB from a shared hosting environment that we used as a staging area to its live server, there were two straightforward ways to migrate the entire website, keeping all content, settings, and customizations intact. We’ll go over both methods in a nutshell and provide essential tips for post-migration setup and security.
Duplicator
Duplicator plugin is a powerful and user-friendly tool to transfer WordPress sites. Here’s a simple guide:
- Install Duplicator: Begin by installing and activating the Duplicator plugin on your staging site.
- Create a New Package: Open Duplicator and select “Create New” to bundle your site files and database into a package.
- Download the Package and Installer: Once the package is complete, download both the package file and installer file.
- Upload to Live Server: Upload these files to the root directory of your new hosting environment.
- Run the Installer: Access the installer (e.g., yoursite.com/installer.php) to initiate the migration process. Duplicator will guide you through setting up the database and unpacking the site content.
Updraft
UpdraftPlus offers a backup and restore option, which is another easy way to transfer your site.
- Install UpdraftPlus on staging site: Set up the UpdraftPlus plugin, navigate to the settings, and initiate a full backup.
- Download backup files: Once the backup completes, download all backup files, including plugins, themes, database, and uploads.
- Install UpdraftPlus on live site: Set up a fresh WordPress installation on your new server and install UpdraftPlus.
- Restore from backup: In UpdraftPlus on the live site, upload your backup files and restore them. UpdraftPlus will take care of the rest, recreating your site structure, files, and database content.
Post-migration checks
Database URL check: After migration, it’s crucial to verify that your database URLs are updated to match the new domain. Plugins like Better Search Replace can help you quickly locate and adjust URLs.
Basic security
In addition to the built-in Leaseweb VPS security features mentioned earlier, we recommend installing Wordfence, a popular plugin that adds an extra firewall and malware scanning specifically for WordPress sites. This tool actively monitors for threats and blocks potential attacks, providing an essential layer of protection.
Enabling two-factor authentication (2FA) for user logins is another straightforward but highly effective step that adds extra security, helping to prevent unauthorized access.
For further guidance on securing your WordPress installation, you’ll find detailed security advice across various tech blogs and WordPress-focused sites.
Summary
Moving our knowledge base to WordPress with BetterDocs has proven to be a smart, adaptable choice that balances technical flexibility with usability. We’re now able to customize the KB in ways that suit our unique needs, keeping information easily accessible for both current and potential clients evaluating our services. This shift has allowed us to deliver a clean, user-friendly experience focused on practical, technical insights.
As we move forward, we’ll keep adapting our knowledge base to meet the needs of a fast-paced, tech-driven environment. The result? A modernized experience that empowers our users, reduces reliance on support, and aligns with Leaseweb’s vision of the customer-centered service.